Caravan repairs - repair of a seized AL-KO tow hitch.
Many types of AL-KO tow hitches are used on caravans. Some suffer from seizure of the hydraulic damper - which renders the caravan brakes inoperative. On others, the damper fails to work, which renders operation of the caravan brakes particularly severe and jerky. Others suffer from stiffness or complete seizure of the main draw tube bushes, which again can render the brakes inoperative, or (less commonly) make them stick in the 'on' position. In all cases, proper diagnosis and repair is essential. This page describes the repair of a seized tow hitch using 'non-approved' methods. These have worked well and have avoided the need to install a complete new hitch assembly at a cost of several hundred pounds. If the problem is a failed damper there is no cheap cure. New ones cost from Ł50 to Ł80 each and must be of the correct type and rating. It is apparently possible to 're-gas' failed units but I have no details of companies able to do this at the moment.
It is important to recognise that much of the advice given by 'professional' caravan repairers is either incompetent or specifically oriented to persuade hapless and inexpert owners to purchase new parts. No doubt these 'sharks' of the caravan trade are looking forward to the day when all caravans will have to undergo an annual 'MoT' type test, a development that will spell the end of caravanning for many owners. Against this it has to be admitted that there are a small number of potentially dangerous caravans on the roads.
Already, MoT tests for cars in the UK have been expanded to include absurd requirements which have little if anything to do with safety, and have turned car owners into 'cash cows' waiting to be milked once a year. Many 'repairs' undertaken by MoT garages are to an appalling standard and add nothing to vehicle safety. However, I digress.....
In respect of the repair of the draw tube bushes described in this webpage, the author was told variously that the whole unit would need scrapping, that the bushes could be line reamed for Ł100, that any repair was dangerous and should not be attempted, that tow hitches should only ever be dismantled by registered dealers (as if they are any more competent than many DIY engineers!!), that swelling of the bushes was caused by the wrong type of grease having been used, that failure was caused by grease of any sort (the suggestion from this 'expert' being that no grease should ever be used despite the provision of grease nipples!) and that Al-KO were well aware of the problems but refused to sell replacement bushes. Little wonder that many owners would give up and pay up!
Stripping down any type of AL-KO tow hitch is straightforward for anyone who is mechanically competent. However, it is advisable to make notes of the order in which components are removed because often they can only be reassembled in reverse order. It is frustrating to reassemble the unit only to find that it has to be stripped down again almost completely to install a missing component! Also, many of the nuts and locking washers are of special types and must be reassembled correctly. Some of the locking washers may be in 'sets' and must be installed the right way round. Using a digital camera to record the process can be useful. Any replacement nuts and bolts must be a high-tensile type ("88 steel" or better).
Always jack up and support the caravan chassis using a wooden beam across both parts of the A frame. If you rely on the jockey wheel to carry the front weight of the caravan and remove the tow hitch the chassis may distort (because only one half of the A frame will be carrying the whole weight). It may then be difficult to remove or replace the tow hitch mounting bolts.
In the unit described below, the only components that needed to be disconnected were the the entire handbrake mechanism (one nut) and the clevis pin to the main brake rod (one split pin). The tow hitch could then be removed from the chassis by undoing and removing the four mounting bolts. Always make a note of how tight bolts are - and aim to retighten them to a similar torque. The bolts securing the tow hitch to the draw tube should not be overtightened because there is a risk of distorting the end of the tube.
Removal of a seized draw tube from the main welded assembly
This can be difficult! First (obviously) remove the damper and all other components. Then the exposed portion of the draw tube should be thoroughly cleaned of all rust and other corrosion until it is bright and shining. If (as is usual) it has seized in the usual towing position, it can best be loosened by banging the hitch lock end smartly downwards onto a large block of soft wood. NEVER USE A HAMMER to hit any part of the draw tube assembly. Using various blocks of wood, the draw tube can be 'hammered' back and forth in an attempt to loosen it up - often to little avail. To remove it completely, first bang it smartly downwards many times onto a large block of softwood until its end is flush with the front face of the front bush. Then use a soft metal drift (or even a socket from a socket set) of the same diameter to force it further through the front bush and (ultimately) through the rear bush. Gentle tapping of the end plate (welded to the end of the draw tube) and using a hammer may be acceptable but do not risk bending this plate. Once the draw tube has been removed, it should be cleaned along its entire length to a bright and corrosion free finish, and then oiled. If it is still a tight fit in the plastic bushes, these have probably swelled (which is apparently a known fault).
The only cure is to reduce the diameter of the draw tube (difficult and not recommended) or to increase the internal diameter of the bushes - in effect to restore them to their original diameter. The crude method shown below is probably adequate for an old caravan that may only do a few thousand miles before being scrapped. The only risk would appear to be that the modified and roughened bushes may eventually wear to an oversize internal diameter - thus giving some lateral 'play' to the draw tube. This is unlikely to be too serious unless it becomes excessive - more than a few thousands of an inch perhaps. When the bushes are the correct size the towing hitch should be able to be 'flicked' from side to side a few mm (this movement being limited by the welded plate at the end of the draw tube hitting the main welded assembly) and pushed easily or even stiffly by hand through the bushes.
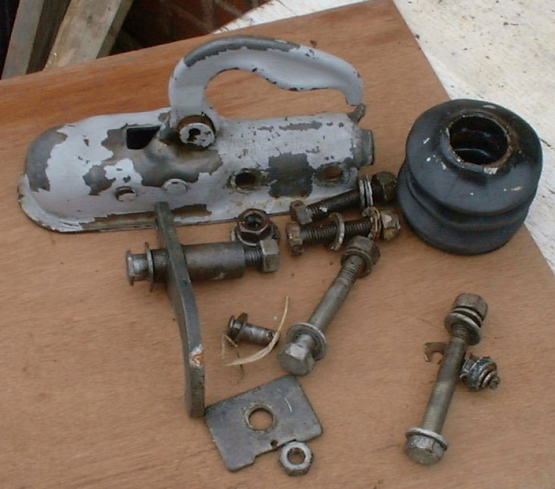
Main components of a typical AL-KO towing hitch. The rectangular metal plate provides the 'end stop' for the draw tube, and limits its reverse travel.
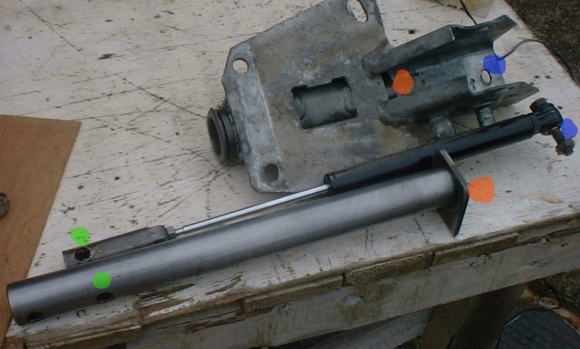
The major components associated with the draw tube. The draw tube should be cleaned of all rust and corrosion using 'wet and dry' paper and paraffin or water. If it is not then a tight but sliding fit in the bushes, these may need to be reamed or filed. The damper is fixed in place at the end of the main welded assembly (blue dots) and using one of the draw tube bolts (green dots). When the draw tube is fully extended in the normal towing position the metal end plate is hard against the rear plastic bush (orange dots).
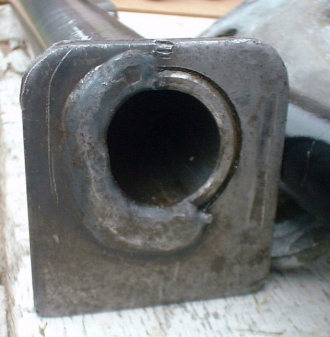
This welded join between the draw tube and the end plate carries all the towing loads. Presumably it is strong enough without being welded all the way round!
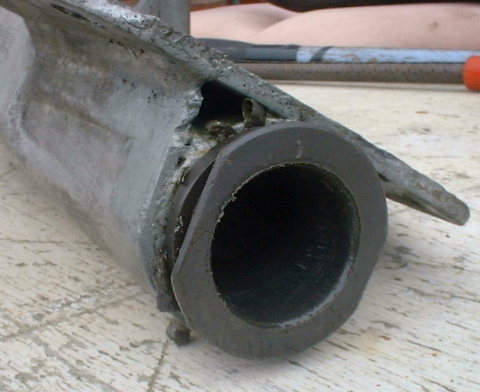
The front plastic bush. This can be filed or reamed quite easily.
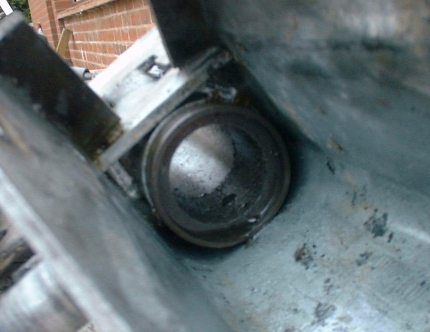
The rear plastic bush is hidden deep within the main welded assembly. It cannot easily be reached.
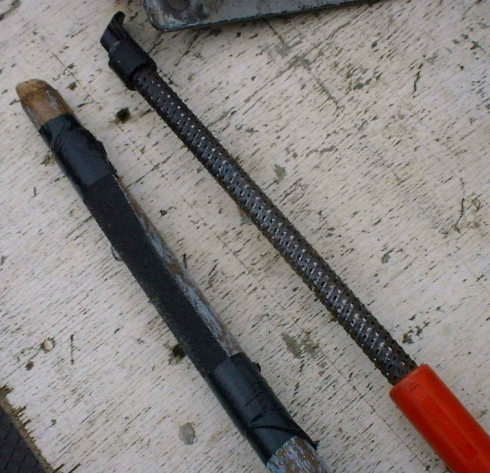
All that is needed for removing excess material from the hard plastic bushes. First, a circular 'Surform' tool can be used to remove a little material from around the internal diameter of each bush. Then, emery cloth wrapped and taped around an old broom handle can be used to remove most of the 'roughness' created by the Surform tool. The finished bore is still rough but should allow the draw tube to slide reasonably freely once it is well oiled and greased.
A repair performed using these methods performed well over 1000 miles.